We often hear that many of the LRS solutions on the market are complex to install and often require additional support services. It shouldn't be so difficult. We’re determined to make our LRS products the easiest to install on the market so you can make the most of your time and focus on learning experience data! This article will walk you through the 5 simple steps for installing our xAPI conformant LRS. We use NodeJS and MongoDB as part of our technology stack so the main prerequisite that’s not included in our steps is installing MongoDB. However, we’ll also provide those resources below. Let’s get started!
Prerequisites:
Download, Install, and Run your own MongoDB. Any version of MongDB will work! First download it from the MongoDB download page. Full instructions to install Veracity Learning are available here:
https://veracitytech.zohodesk.com/portal/en/kb/articles/installation
Note: During installation, you’ll be provided some options for Mongo.
VERACITY LITE INSTALLATION STEPS
STEP1: DOWNLOAD
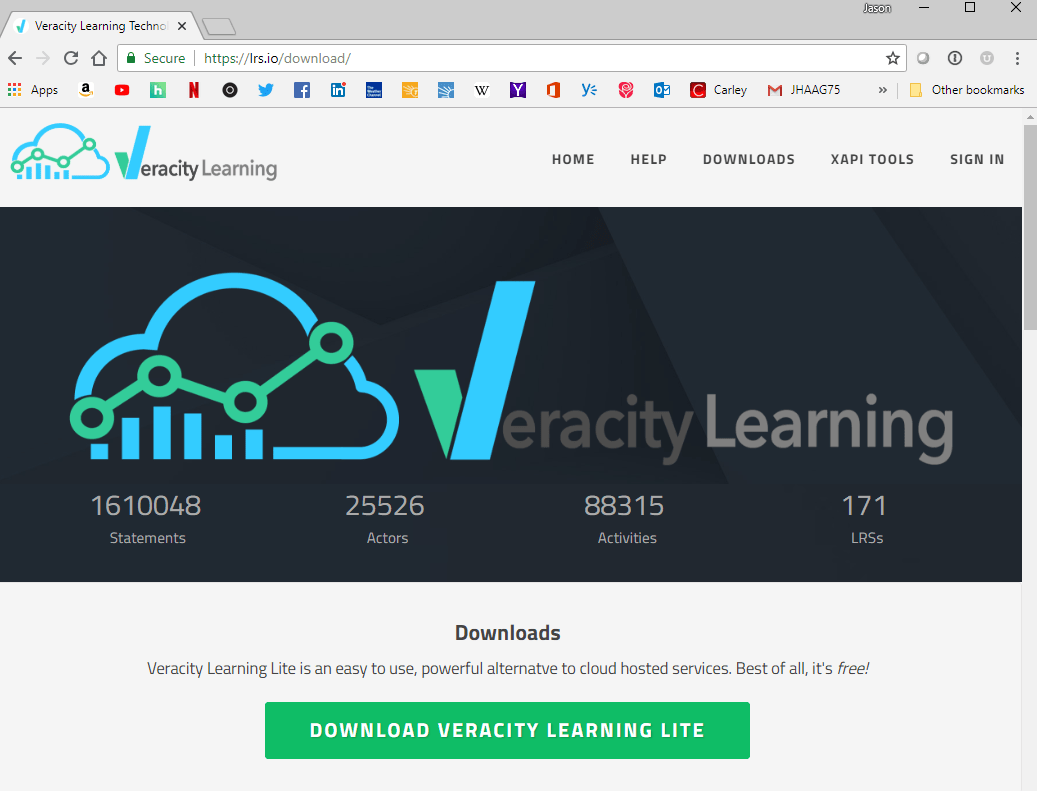
Go to https://lrs.io/home/download and click the Download Veracity Learning Lite green button (links to VeracityLite.zip) to begin the download. See screen capture below.
STEP 2: EXTRACT DOWNLOADED FILE
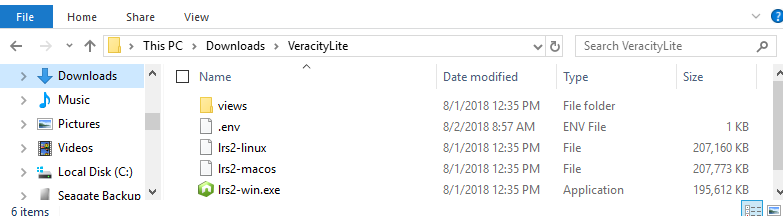
Once downloaded, extract the zip file contents. The default location is usually your downloads folder. If you extracted the zip file without changing the location or the name of the file, the folder should be named “VeracityLite” in your downloads. See screen capture below.
STEP 3: RUN EXECUTABLE
Open a command prompt or terminal window and change directories to the location where the zip file was extracted, then run the appropriate executable for your operating system. Our LRS runs on Windows, Mac OS, or Linux. The executable file name you need to choose will be lrs2-win, lrs2-macos, or lrs2-linux, depending upon which OS you’re using. Simply type the name of the file you want to run. For example, on Windows you would type the following:
C:\Users\yourusername\cd downloads\VeracityLite

C:\Users\yourusername\Downloads\VeracityLite>lrs2-win.exe
STEP 4: CONFIGURE ENVIRONMENT
Next, you’ll answer some configuration questions provided through the console. Simply answer and hit the enter button to confirm. Most of the default values are acceptable. Review the Veracity Lite Download Page for specific advice on how to answer these prompts and configure your server. Make sure you answer “yes” to the final question as this will generate an “env” file that will contain your environmental/configuration settings for the LRS.
STEP 5: START SERVER
Next, you’ll simply run the server by typing the executable again. For example, type the name of the executable after the last configuration prompt from step #4. For example, on windows:
Settings have been written to .env file. You may edit this file manually if you prefer. Please run the program again.
Start the server by typing the following:
C:\Users\yourusername\Downloads\VeracityLite>lrs2-win.exe
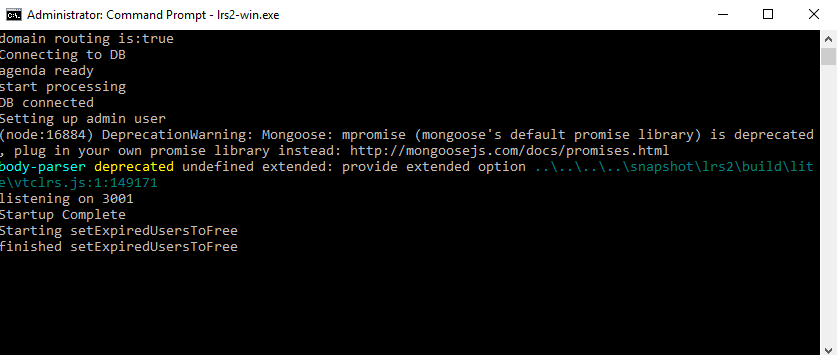
After the server starts, you should see the following confirmation that the server is running. See screen capture below for an example.
After the server starts, open a browser window and go to local.veracity.it:0000 (where “0000” is the port number you chose during step 4).
That’s it! Congratulations! You’re now running Veracity’s Lite Version of the LRS.
Was that easy or what? Please send feedback and let us know what you think! We want to make this the easiest LRS to install and use on the market. Your feedback will help us improve it even more!